CANDLESTICK PATTERNS
LIST OF 145 CANDLESTICK PATTERNS WITH CHARTS FOR FREE|| TRADE LIKE A PRO
INTRODUCTION:
The most popular type of chart used in trading is the Candlestick Chart, which is used by experienced traders in almost all countries.
Because, this Candlestick has some special features by which the behavior of buyers and sellers of the trading market, future course of actions are reflected in the chart.
By Discussing the basics of this Candlestick's history, method of formation, etc., this short essay will turn into a huge manuscript and the reader will move away from the main content, so refrain from discussing all those basics. We have read more or less different topics about different types of Candlestick.
These candlesticks are available in a variety of combinations or patterns. You have to decide to buy and sell in trading keeping in mind these combinations or patterns, but it is very difficult to remember all kinds of patterns. If all kinds of patterns can be seen at a single page, then it is very easy to remember.
For that purpose, almost all the common patterns of Candlestick are drawn in the table and their introduction and application is shown in a concise form.
__________________________________________
Note : we update this post every week
So please stay connected , for all 145 CANDLESTICK PATTERNS detailed information .
If you want this free course information and our weekly updates by email then please subscribe this blog. And don't forget to follow us on Facebook and Instagram. Link in home page.
Last update 10 / 04 / 2021
following us is a Free Investment ✔️
Thank you
1 : Doji Star ( Bullish) ↖️
2 : Doji Star ( Bearish) ↖️
3 : Doji Star ( Upward Continuation)↖️
4 : Doji Star ( Downward Continuation) ↖️
5 : Southern Doji↖️
6 : Northern Doji↖️
7 : Long - Legged Doji ( Bullish) ↖️
8 : Long - Legged Doji ( Bearish) ↖️
9 : Long - Legged Doji ( Upward Continuation) ↖️
10 : Long - Legged Doji ( Downward Continuation) ↖️
11 : Tri - Star ( Bullish) ↖️
12 : Tri - Star ( Bearish) ↖️
13 : Abandoned Baby ( Bullish) ↖️
14 : Abandoned Baby ( Bearish) ↖️
15 : Island Reversal ( Bullish) ↖️
16 : Island Reversal ( Bearish)↖️
17 : Morning Star↖️
18 : Evening Star↖️
19 : Morning Doji Star↖️
20 : Evening Doji Star↖️
21 : Spinning Top ( Bullish)↖️
22 : Spinning Top ( Bearish) ↖️
23 : Spinning Top ( Upward Continuation) ↖️
24 : Spinning Top ( Downward Continuation) ↖️
25 : Dragonfly Doji ( Bullish) ↖️
26 : Dragonfly Doji ( Bearish) ↖️
27 : Gravestone Doji ( Bearish) ↖️
28 : Gravestone Doji ( Bullish) ↖️
29 : Harami ( Bullish) ↖️
30 : Harami ( Bearish) ↖️
31 : Harami Cross ( Bullish) ↖️
32 : Harami Cross ( Bearish) ↖️
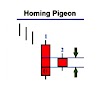
33 : Homing Pigeon↖️
34 : Descending Hawk↖️
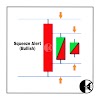
35 : Squeeze Alert ( Bullish )↖️
36 : Squeeze Alert ( Bearish )↖️
37 : Unique Three River Bottom↖️
38 : Upside Gap Two Crows↖️
39 : Three Inside Up↖️
40 : Three Inside Down↖️
41 : Hammer
42 : Hanging Man
43 : Inverted Hammer
44 : Shooting Star
45 : Pin Bar ( Bullish )
46 : Pin Bar ( Bearish )
47 : Engulfing ( Bullish )
48 : Engulfing ( Bearish )
49 : Three Outside Up
50 : Three Outside Down
51 : Inside Day
52 : Outside Day
53 : Hook Reversal ( Bullish )
54 : Hook Reversal ( Bearish )
55 : Piercing Line
56 : Dark Cloud Cover
57 : Above the Stomach
58 : Below the Stomach
59 : Thrusting Line ( Bullish )
60 : Thrusting Line ( Bearish )
61 : Big White Candle
62 : Big Black Candle
63 : White Marubozu
64 : Black Marubozu
65 : Open Marubozu ( White )
66 : Open Marubozu ( Black )
67 : Close Marubozu ( White )
68 : Close Marubozu ( Black )
69 : Belt Hold ( Bullish )
70 : Belt Hold ( Bearish )
71 : Concealing Baby Swallow ( Bullish )
72 : Concealing Baby Swallow ( Bearish Continuation )
73 : Tweezer Bottom
74 : Tweezer Top
75 : Matching Low
76 : Matching High
77 : Stick Sandwich ( Bullish )
78 : Stick Sandwich ( Bearish )
79 : Gap Up / Rising Window
80 : Gap Down / Falling Window
81 : High Price Gapping Play
82 : Low Price Gapping Play
83 : Breakaway ( Bullish )
84 : Breakaway ( Bearish )
85 : Tower Bottom
86 : Tower Top
87 : Fry Pan Bottom
88 : Dumpling Top
89 : Upside Tasuki Gap
90 : Downside Tasuki Gap
91 : Upside Gap Three Methods
92 : Downside Gap Three Methods
93 : Deliberation ( Bullish )
94 : Deliberation ( Bearish )
95 : Side by Side White Lines ( Bullish )
96 : Side by Side White Lines ( Bearish )
97 : Bullish Kicking
98 : Bearish Kicking
99 : Rising Three Methods
100 : Falling Three Methods
101 : Mat Hold (Bullish)
102 : Mat Hold (Bearish)
103 : Ladder Bottom
104 : Ladder Top
105 : One White Soldier
106 : One Black Crow
107 : Two Rabbits
108 : Two Crows
109 : Three White Soldiers
110 : Three Black Crows
111 : Identical Three Soldiers
112 : Identical Three Crows
113 : Descent Block
114 : Advance Block
115 : Three Line Strike (Bullish)
116 : Three Line Strike (Bearish)
117 : Three Stars in the South
118 : Three Stars in the North
119 : In Neck
120 : On Neck
121 : Separating Lines (Bullish)
122: Separating Lines (Bearish)
123 : Meeting Lines (Bullish)
124 : Meeting Lines (Bearish)
125 : Counter Attack Line (Bullish)
126 : Counter Attack Line (Bearish)
127 : Eight Candle Reversal (Bullish)
128 : Eight Candle Reversal (Bearish)
129 : Stalled Pattern (Bullish)
130 : Stalled Pattern (Bearish)
131 : San-Ku Triple Gap (Bullish)
132 : San-Ku Triple Gap (Bearish)
133 : Paper Umbrella / Karakasa
134 : Four Price Doji
135 : High Wave
136 : Short Candlestick
137 : Deviant Doji Candlestick
138 : Wash 'n' Rinse (Bullish)
139 : Wash 'n' Rinse (Bearish)
140 : Tweezer Bottom and Hammer
141 : Tweezer Top and Hanging Man
142 : Tweezer Bottom and Piercing Line
143 : Tweezer Top and Dark Cloud Cover
144 Tweezer Top and Harami Cross
145 : Tweezer Top and Shooting Star
Thank you
_________________________________________________
: MAIN LIST :
2 : Doji Star ( Bearish) ↖️
3 : Doji Star ( Upward Continuation)↖️
4 : Doji Star ( Downward Continuation) ↖️
5 : Southern Doji↖️
6 : Northern Doji↖️
7 : Long - Legged Doji ( Bullish) ↖️
8 : Long - Legged Doji ( Bearish) ↖️
9 : Long - Legged Doji ( Upward Continuation) ↖️
10 : Long - Legged Doji ( Downward Continuation) ↖️
11 : Tri - Star ( Bullish) ↖️
12 : Tri - Star ( Bearish) ↖️
13 : Abandoned Baby ( Bullish) ↖️
14 : Abandoned Baby ( Bearish) ↖️
15 : Island Reversal ( Bullish) ↖️
16 : Island Reversal ( Bearish)↖️
17 : Morning Star↖️
18 : Evening Star↖️
19 : Morning Doji Star↖️
20 : Evening Doji Star↖️
21 : Spinning Top ( Bullish)↖️
22 : Spinning Top ( Bearish) ↖️
23 : Spinning Top ( Upward Continuation) ↖️
24 : Spinning Top ( Downward Continuation) ↖️
25 : Dragonfly Doji ( Bullish) ↖️
26 : Dragonfly Doji ( Bearish) ↖️
27 : Gravestone Doji ( Bearish) ↖️
28 : Gravestone Doji ( Bullish) ↖️
29 : Harami ( Bullish) ↖️
30 : Harami ( Bearish) ↖️
31 : Harami Cross ( Bullish) ↖️
32 : Harami Cross ( Bearish) ↖️
33 : Homing Pigeon↖️
34 : Descending Hawk↖️
35 : Squeeze Alert ( Bullish )↖️
36 : Squeeze Alert ( Bearish )↖️
37 : Unique Three River Bottom↖️
38 : Upside Gap Two Crows↖️
39 : Three Inside Up↖️
40 : Three Inside Down↖️
41 : Hammer
42 : Hanging Man
43 : Inverted Hammer
44 : Shooting Star
45 : Pin Bar ( Bullish )
46 : Pin Bar ( Bearish )
47 : Engulfing ( Bullish )
48 : Engulfing ( Bearish )
49 : Three Outside Up
50 : Three Outside Down
51 : Inside Day
52 : Outside Day
53 : Hook Reversal ( Bullish )
54 : Hook Reversal ( Bearish )
55 : Piercing Line
56 : Dark Cloud Cover
57 : Above the Stomach
58 : Below the Stomach
59 : Thrusting Line ( Bullish )
60 : Thrusting Line ( Bearish )
61 : Big White Candle
62 : Big Black Candle
63 : White Marubozu
64 : Black Marubozu
65 : Open Marubozu ( White )
66 : Open Marubozu ( Black )
67 : Close Marubozu ( White )
68 : Close Marubozu ( Black )
69 : Belt Hold ( Bullish )
70 : Belt Hold ( Bearish )
71 : Concealing Baby Swallow ( Bullish )
72 : Concealing Baby Swallow ( Bearish Continuation )
73 : Tweezer Bottom
74 : Tweezer Top
75 : Matching Low
76 : Matching High
77 : Stick Sandwich ( Bullish )
78 : Stick Sandwich ( Bearish )
79 : Gap Up / Rising Window
80 : Gap Down / Falling Window
81 : High Price Gapping Play
82 : Low Price Gapping Play
83 : Breakaway ( Bullish )
84 : Breakaway ( Bearish )
85 : Tower Bottom
86 : Tower Top
87 : Fry Pan Bottom
88 : Dumpling Top
89 : Upside Tasuki Gap
90 : Downside Tasuki Gap
91 : Upside Gap Three Methods
92 : Downside Gap Three Methods
93 : Deliberation ( Bullish )
94 : Deliberation ( Bearish )
95 : Side by Side White Lines ( Bullish )
96 : Side by Side White Lines ( Bearish )
97 : Bullish Kicking
98 : Bearish Kicking
99 : Rising Three Methods
100 : Falling Three Methods
101 : Mat Hold (Bullish)
102 : Mat Hold (Bearish)
103 : Ladder Bottom
104 : Ladder Top
105 : One White Soldier
106 : One Black Crow
107 : Two Rabbits
108 : Two Crows
109 : Three White Soldiers
110 : Three Black Crows
111 : Identical Three Soldiers
112 : Identical Three Crows
113 : Descent Block
114 : Advance Block
115 : Three Line Strike (Bullish)
116 : Three Line Strike (Bearish)
117 : Three Stars in the South
118 : Three Stars in the North
119 : In Neck
120 : On Neck
121 : Separating Lines (Bullish)
122: Separating Lines (Bearish)
123 : Meeting Lines (Bullish)
124 : Meeting Lines (Bearish)
125 : Counter Attack Line (Bullish)
126 : Counter Attack Line (Bearish)
127 : Eight Candle Reversal (Bullish)
128 : Eight Candle Reversal (Bearish)
129 : Stalled Pattern (Bullish)
130 : Stalled Pattern (Bearish)
131 : San-Ku Triple Gap (Bullish)
132 : San-Ku Triple Gap (Bearish)
133 : Paper Umbrella / Karakasa
134 : Four Price Doji
135 : High Wave
136 : Short Candlestick
137 : Deviant Doji Candlestick
138 : Wash 'n' Rinse (Bullish)
139 : Wash 'n' Rinse (Bearish)
140 : Tweezer Bottom and Hammer
141 : Tweezer Top and Hanging Man
142 : Tweezer Bottom and Piercing Line
143 : Tweezer Top and Dark Cloud Cover
144 Tweezer Top and Harami Cross
145 : Tweezer Top and Shooting Star


Post a Comment
0 Comments